How to Make a Cushion Cover by Hand - Crafting Comfort
Share
Is your sofa a little strait-laced? And you feel like a warm hug? We know what you need - A cozy cushion that just begs you to sit back and relax in its soft embrace.

Cushions are one of those things that are not top-of-the-list when furnishing your home. But, boy-oh-boy, do they make a difference when you finally get them. Okay, maybe someone else got them for you, but you do get the point, don’t you?
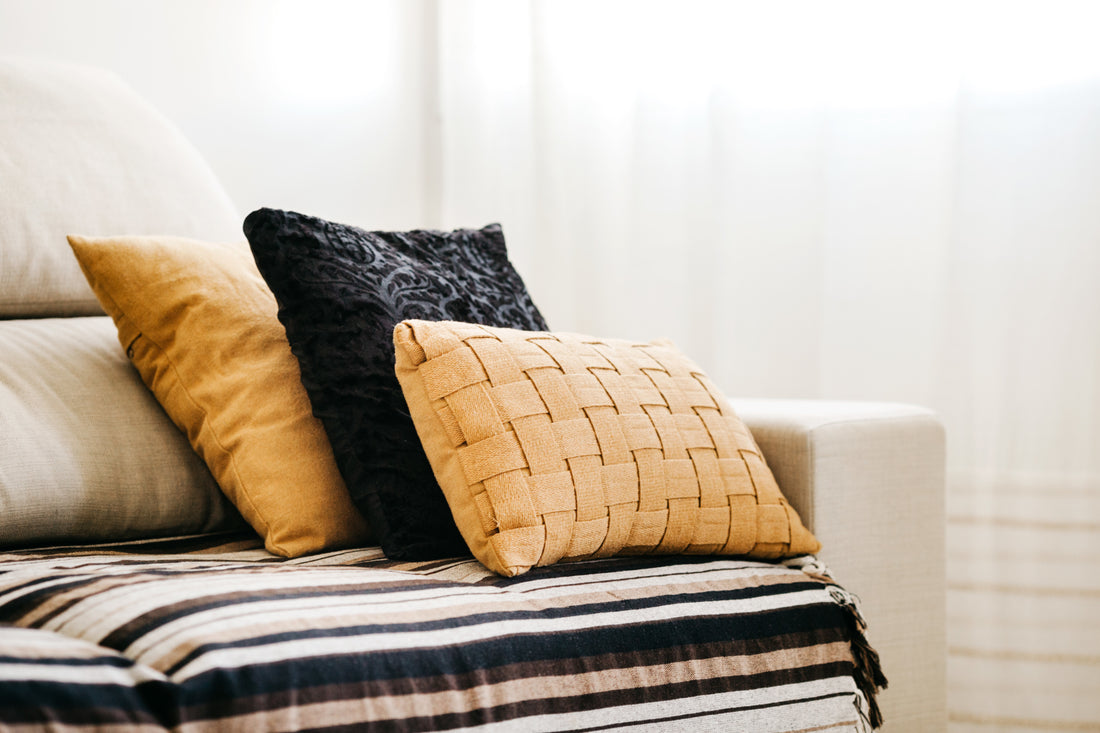
Cushions come in a wide range of shapes and sizes and they snuggle in, on your bed, couch or sofa. Anywhere you sit or relax. They can be a substitute for your pillows, in a pinch. If you have kids, then yes, building a fort with cushions is great fun. If you have an uncluttered, elegant home, then cushions add a pop of colour and style to your living spaces. There are just so many colours, materials and sizes out there, just waiting for you to pick them up.
Making Cushion Covers
Adding cushions to your home decor is a great way to add personality, warmth, and style to your living space. Crafting your own cushion covers makes it a rewarding and budget-friendly DIY project. Whether you're looking to upgrade your existing cushions or bring some colour and style to your furniture, making your own cushion covers is a pretty easy way to do it.
Of course, if you are not the crafty type, do head over to Fafa Living for some elegant, snazzy designs that will rack up the luxury and style quotient of your home in a jiffy.
If you are feeling like flexing your art and craft muscles, though, join us as we take you through the process of making cushion covers, focusing on materials commonly used in Australia.
How Do You Make a Cushion Cover by Hand?
Cushion covers are a simple yet effective way to transform the look of your home decor. With the right materials and a little creativity, you can easily make cushion covers that not only match your style but also add a personal touch to your living space. In this DIY guide, we explore the materials needed for creating cushion covers and provide step-by-step instructions on how to sew a simple one. So, grab your sewing machine, and let's get started!
The very first step is to decide on the size and shape of your cushions. You have the option to either purchase pre-made cushion inserts or craft them from scratch. Opting for inserts is recommended for beginners or if you intend to give the covers as a gift, as they come in standard sizes and making additional covers is easier.
Choosing the Right Fabric
Selecting the ideal fabric is the next step in creating a cushion cover. In Australia, you have a diverse range of options, each with its advantages. The most popular fabrics when making a cushion cover by hand are:
Cotton: Cotton is a popular choice for cushion covers due to its breathability, versatility, and durability. It's comfortable, available in numerous colours and patterns, and can withstand frequent washing and wear. Australian cotton is known for its quality and resilience, making it a great choice, especially in sunny and hot regions.

Linen: Linen is a natural, breathable fibre, perfect for warm Australian climates. It exudes elegance and complements a relaxed, coastal decor. Its lightweight and breathable nature keeps you cool during scorching summers, making it a wise choice for Australian homes.
Canvas: Canvas is a robust, outdoor-friendly fabric, ideal for cushions exposed to the elements. It is water-resistant and can endure the harsh Australian sun, making it perfect for outdoor cushions.
Velvet: If you desire a luxurious ambience, velvet is an excellent option. It offers plushy comfort and style with a range of vibrant colours, making it perfect for creating a cozy atmosphere indoors.
Suede: Suede fabric is soft and plush, adding a touch of luxury to your decor. Its durability and resistance to wear make it an ideal choice for high-traffic areas and cooler months.
Buy the best bohemian cushion cover products in Melbourne
What Do You Need to Make Cushion Covers?
Before you begin stitching your cushion covers, gather the necessary materials and tools. Here's a list of what you'll need:
Cushion Insert:
Select the appropriate cushion insert size for your cover. Common sizes in Australia include 45x45cm, 50x50cm, and 60x60cm. To fill it out nicely, ensure the insert is slightly larger than the cover.
Fabric:
Like we said, fabric is paramount. You need fabric for both the front and back of the cushion cover.
For the cushion cover front, choose a fabric that complements your home decor. Consider the colour and pattern that you think will accent your living spaces.
For the cushion cover back, you can use the same fabric as the front or opt for a contrasting fabric to add a twist.
Measuring Tools:
Measuring tape or ruler to help stick to the cushion cover dimensions.
Sewing Machine:
A basic sewing machine with a straight and zigzag stitch will suffice for this project.
Scissors:
Sharp fabric scissors for cutting the fabric.
Pins:
Straight pins to secure the fabric in place while sewing.

Thread:
Match the thread colour to your fabric for a polished finish. Or, you can go for a contrasting colour that echoes the accents in your home.
Iron and Ironing Board:
These will help you press the fabric and create crisp seams, just like a professional!
Steps to Stitch a Simple Cushion Cover
Now that you have your materials ready, let's dive into the step-by-step process of making a basic cushion cover.
Step 1: Measure and Cut Your Fabric
Using your measuring tape or ruler, mark the size of your cushion cover. Typically, for a square cushion cover, you will want to cut two identical fabric pieces, one for the front and one for the back. Be sure to add 2-3 cm to each side for seam allowances.
Step 2: Pin the Fabric
With the right sides of the fabric facing each other, pin the edges together, leaving one side open for inserting the cushion. Make sure the pins are placed close to the edge and remove them as you sew.
Step 3: Sew the Edges
Using your sewing machine, start sewing around the three sides of the fabric, leaving the fourth side open. Sew with a straight stitch about 1.5 cm from the fabric edge. Reinforce the corners by backstitching.
Step 4: Trim Excess Fabric
Trim any excess fabric, especially at the corners, to reduce bulk. This will help your cushion cover look neat when turned right side out.
Step 5: Turn the Cover Right Side Out
Carefully turn the cover right side out, gently pushing the corners with your finger or a blunt object to make them sharp.
Step 6: Iron the Cover
Lay the cover flat and press it with an iron to remove any wrinkles and create crisp seams. Be cautious with the iron's temperature, as it depends on the fabric you've chosen.
Step 7: Insert the Cushion
Slide your cushion insert into the cover through the open side. Ensure it fits snugly and reaches all corners.
Step 8: Close the Cushion Cover
Fold in the raw edges of the open side and pin them together. Use your sewing machine to sew this side shut, making sure to backstitch at the beginning and end for added durability.
Step 9: Finishing Touches
Give your cushion cover one last ironing to make it look neat and flawless. Now, your DIY cushion cover is ready to enhance your home decor!
Buy the best cushion & throw products in Melbourne
More Styles of Cushion Covers
Now that you've mastered the basics, let's explore a few different styles of cushion covers you can create to suit various aesthetics in your home.
Envelope Cushion Cover:
This style features overlapping fabric flaps on the back, making it easy to insert or remove the cushion insert. No zippers or buttons are required!
Patchwork Cushion Cover:
Combine various fabric scraps to create a unique patchwork cushion cover. This style allows you to showcase your creativity and make use of leftover fabrics.
Appliqué Cushion Cover:
Add a personal touch by sewing appliqué designs onto your cushion cover. It could be flowers, animals, or any pattern that speaks to you.
How to Make a Cushion Cover with a Zip
To include a zip in your cushion cover, position the zipper along one edge of the front and back fabric pieces, right sides facing in, and sew it in place. Once the zipper is securely attached, sew the remaining sides of the fabric together, leaving a small opening for turning the cover right side out. After turning, you can insert the cushion and zip it closed.
How to Make a Cushion Cover with Piping
Flex your artistic muscles and add a decorative touch to your cushions by including piping. Sew fabric piping around the edges of your cushion cover for a sophisticated look.
How to Make a Buttoned Cushion Cover
Sew buttonholes on one side and attach buttons on the other for a classic closure style. Choose stylish buttons to complement the fabric and your home décor.
Covering Up
In conclusion, crafting your own cushion covers is an easy way to liven up your home decor and showcase your personal style. With the right materials and a touch of sewing expertise, you can effortlessly fashion simple cushion covers. Whether you choose a simple, classic design or get your creative juices flowing with different styles, your hand-made cushion covers will add a unique flair to your living space. And if you're up for a slightly more challenging task, consider learning how to make a cushion cover for a bench.

When you begin your DIY journey on how to make a cushion cover by hand, remember that fabric choice is crucial, especially in Australia’s demanding climate. Whether you prefer the sturdiness of canvas, the luxury of velvet, or the comfort of suede, each material offers its distinct strengths, catering to various needs and styles. With the perfect fabric and a dash of imagination, you can design cushion covers that not only enhance your living space's comfort but also infuse it with the distinctive charm of Down Under.
Buy the best cushion & throw products in Melbourne
So, select your favorite fabrics, fire up that sewing machine, and let your creative spirit soar as you stitch your way to a more stylish and personalized home. Happy crafting!
